
Batteries power many things we use on a daily basis. In fact, it’s not crazy to say that the average person probably interacts with a dozen or more battery-powered devices every day. Things like cars, watches, cell phones, smoke alarms, forklifts, and even life-saving devices like pacemakers contain batteries.
If you ask someone where to get a battery, they’d say go to the store. But did you know you can actually make batteries out of fairly common items you have around the house? You might not be able to put this homemade battery into a tablet, but you can power something basic with it.
First, gather the following materials:
- A simple plastic cup (any size will do)
- A tablespoon of salt
- A small strip of aluminum (aluminum foil will work)
- A small strip of zinc (available at many hardware stores or online)
- Two alligator clips (found at many electronics or hardware stores)
- A voltage meter (also found at many electronics/hardware stores)
- Electrical tape
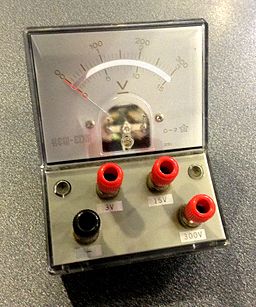
Step 1: Preparing the Voltage Meter
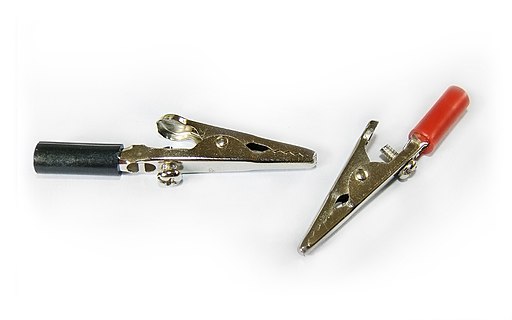
Your voltage meter will be made up of a small device with two wires coming off of it (a red one and a black one). These wires will have small metal terminals at the end. To use a voltage meter, you touch the red terminal (the positive one) to the positive end of a batter, circuit, etc. and the black terminal (the negative one) to the negative end.
However, that’s not going to work here. Instead, we’re going to need to modify the voltage meter just a bit. Take one of your alligator clips and, using the electrical tape, tape it to the positive wire. You’re going to need to be able to open the clip, so be sure you only tape one side of it to the terminal.
Repeat this process for the negative terminal.
You should now be able to open the alligator clips on both terminals so you can attach the voltage meter to something.
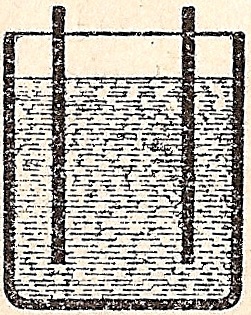
Step 2: Fill the cup with water.

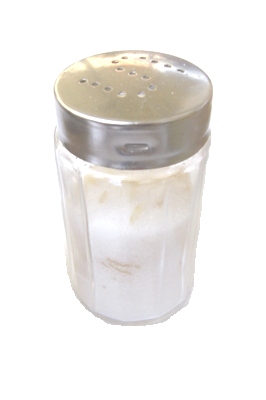
Step 3: Add a tablespoon of basic salt to the cup of water.
Step 4: The Cooper Strip

Take your copper strip and bend about a fourth of it over. Put the strip into the cup, hooking the folded part over the lip of the cup so that it holds part of the strip out of the water. You should have a short bit of the strip hanging over the side of the cup.
Make sure a good part of the strip is in the water—if it’s not, you may need to add more water.
Step 5: The Zinc Strip
Do the same with the strip of zinc – fold over about a fourth of it and hook it over the lip of the cup.
Step 6: Attach the Voltage Meter
Attach one of the terminals to the part of the copper strip that hangs outside of the cup using the alligator clip you’ve taped to it. Then attach the other terminal to the zinc strip.
The alligator clips should NOT touch the water.
Note: be careful not to accidentally pull on your voltage meter or you may tip the cup over and make a mess!
Step 7: Test Your New Battery
Turn on the voltage meter and see how much voltage your homemade salt water battery is producing. The meter should show about ¾ of a volt. If you’re unsure how to use the voltage meter, refer to the instructions that came with it.
Conclusion
Congratulations! You’ve created a functional battery. This battery works on the same function as Alessandro Volta’s battery did. Volta discovered that he could power a device by creating a stack of alternating layers of silver, zinc, and paper that had been soaked in saltwater. This type of battery became known as a voltaic pile, and your saltwater battery is simply another way of creating one of these.
But years before Volta, Benjamin Franklin was experimenting with batteries. In fact, he came up with the term. His battery, however, was a type of charged glass plates. However, his method wasn’t very practical. Volta’s battery could be used in a number of different devices. John Daniell, William Robert Gove, and Gaston Plante later built upon Volta’s ideas, creating more reliable, powerful, and smaller batteries.
Batteries can be used to power almost anything, and today, there are a number of different types of batteries. Some use chemicals like lithium, while others harvest solar power. Some of these batteries are so powerful they can run a device for decades. Batteries range in size from tiny batteries to large forklift batteries to giant batteries used in NASA equipment.
- How Batteries Work – a basic introduction to batteries
- History of the Battery – a more in-depth look at the history of batteries
- Electrochemistry – the basics of the principles of electrochemistry
- Battery Basics – a layman’s guide to batteries
- How Batteries Store Power–the science behind storing and releasing energy
- Spare Change Batteries – an alternative way of making a battery using pennies
- Forklift Battery Chargers – determine which charger is right for your application