
JUMP-TO LINKS: Assemble Forklift Carriage, Disassemble Forklift Carriage
How To: Remove & Install Forklift Carriage
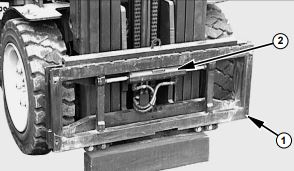
- To start, raise carriage (1), position a wooden block as shown, and lower carriage (1) onto the wooden block.
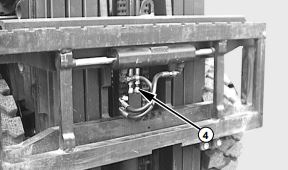
- Next, disconnect two hydarulic lines (4) from side shifter cylinder. Plug and cap all openings to prevent contamination.
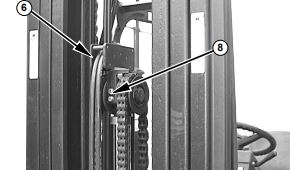
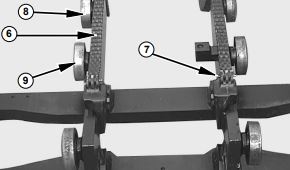
- Then, remove four bolts (8) from the chain guard/hose support assembly. Set the hoses aside away from the cylinder & cross head.
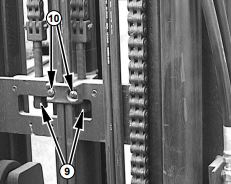
- Remove two bolts (10) from the hose mounting bracket and set the hoses aside. Then, remove the nuts (9) from the chain anchors and set them aside away from the clear of the mast.
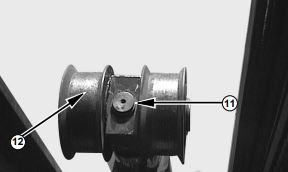
- Now, use a tool to remove the retainer ring (11) from the cross head shift.
- Remove the cross head (12) from the shaft.
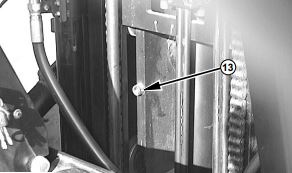
- Remove the carriage bolts (13).
- Raise the inner mast in order to pull out carriage.
- Remove the carriage from the bottom of the inner mast (15). Carriage (14) weighs 255 lb.
- Raise the inner mast to put in the carriage onto the mast and lower the inner mast to cover the carriage (1) bearing fully.
- Install the carriage bolts (13).
- Now, install the cross head(12) and retaining ring (11).
- Put the chains in position over the cross head (12), install nuts (9) onto the chain anchors, and install the bolts (10) onto the hose mounting bracket.
- Install the chain guard and hose support assembly (6) and four bolts (8).
- Finally, connect two hydraulic lines (4) to their original positions. End by installing the backrest and the forks.

How To: Disassemble Forklift Carriage
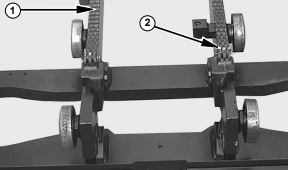
- First, remove the roller pins & pins (2) to disconnect the chains (1).
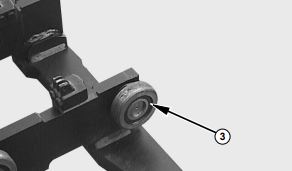
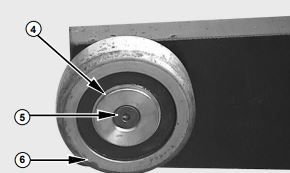
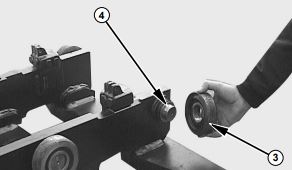
- Next, remove the four lower roller bearings (3) and the shims from the carriage.
- Finally, remove the screw (5) and washer (4) and remove the top roller bearings (6) and the shims.
How To: Assemble Forklift Carriage
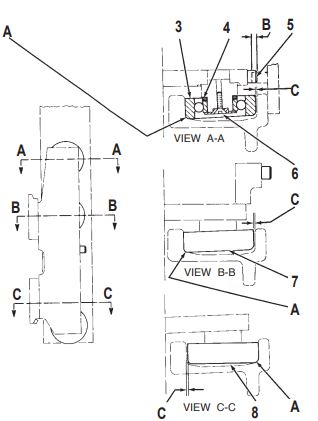
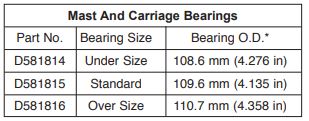
- To start, select lower bearings from the belwo chart to obtain a minimum clearance (B) between bearings and channel leg for full channel length.
- Next, find the narrowest point by ruler on the inner mast in the area where the bearings make contact.
- Now, install enough shims (4) that have been equally divided behind the bearings (3). At installation, the should be no contact (zero clearance (A)) between bearings and the narrowest point, as described in step 2.
- Then, do steps 2-3 for the other set of bearings (8) & (9).
- Tighten screw (5) that holds the top bearings carriage. There should be a torque of 34 +/- 7 Nm (newton meters).
- Shim stop bolt (11) as required to obtain a 6-9 mm lap with top carriage stop on the inner upright.
- Finally, position the chains (6) on the carriage and install the pins (7) and the roll pins.


Got questions?
Give us a call at (616) 796-6638, or leave a reply below.